How to Install Google Edition Rom on LeEco Le Pro3
Google Edition Rom for LeEco Le Pro3-
Google Edition based Custom Rom now available for LeEco Le Pro3, Xda member cydras make a build of Google Edition Rom for LeEco Le Pro3 and here is a Step by step Guide to install google edition Rom on LeEco Le Pro3,
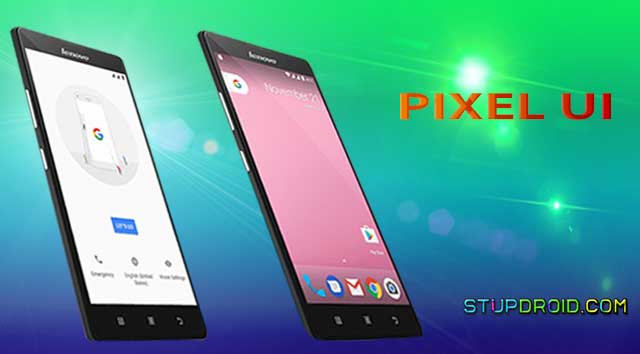
Download and install Google Edition Rom on LeEco Le Pro3, today we will Show you how to install google Edition Rom on LeEco Le Pro3, This is a Initial build of Rom with Some minor bug but Don't worry that are very small and not effect your Daily use, the Rom Come with All google Pixel apps including Dialer, launcher, contact and more which is found in features tab, to install the Rom your Device must be rooted with twrp recovery installed, if not first of all root your device, a guide may present on our site follow Here,
Search tag-
Google Edition based Custom Rom now available for LeEco Le Pro3, Xda member cydras make a build of Google Edition Rom for LeEco Le Pro3 and here is a Step by step Guide to install google edition Rom on LeEco Le Pro3,

Download and install Google Edition Rom on LeEco Le Pro3, today we will Show you how to install google Edition Rom on LeEco Le Pro3, This is a Initial build of Rom with Some minor bug but Don't worry that are very small and not effect your Daily use, the Rom Come with All google Pixel apps including Dialer, launcher, contact and more which is found in features tab, to install the Rom your Device must be rooted with twrp recovery installed, if not first of all root your device, a guide may present on our site follow Here,
Note-
- Make sure that the battery is more than 30% and so as to ensure that during the flashing process the phone will not turn off.
- Flashing risk, please read the tutorial on flashing carefully and bear the risk, We are not responsible for any failure from flashing;
- Warranty ceased due to flashing any failures, brick and other issues will Not be my responsibility
- If you use this tutorial, it means that you accepted this agreement.
- Make a Nandroid Backup Before Doing Anything,
- take A Backup of your Personal Data's including contact, call history, message and Apps,
Downloads-
update - you can update to latest version from about phone section,
Features of the Rom:
- Based on V2_LE_ZL1_LEX720-CN-FN-WAXCNFN5902011181S-5.9.020S
- Root
- Busybox
- Removed all Chinese Apps
- Debloated
- 400dpi for more screen usage
- Google Pixel Boot Animation
- Google Pixel Launcher
- Google Pixel Dialer
- Google Play Store
- Google Camera
- Google Keyboard
- Google Messenger
- Google Calculator
- Google Calendar
- Google Chrome
- Google Keep
- Google Mail
- Google Maps
- Google Music
- Google Photos
- agnes_service
- A-HNSideBar
- A-MiuiSigned
- A-Miuitimingoff
- AppFreezer
- BackupRestoreConfirmation
- Browser
- BugPostbox
- ButtonLed
- Calculator
- Calendar
- com.langyuye-setting-1
- cpu
- DSSettings
- Exchange2
- FactoryMode
- FactoryTest
- GallerySyncService
- IRTest
- Launcher3
- LeFreeFlow
- LePay
- LeShareZL1
- LeSo
- leSport
- LetvAccount
- LetvBackupClient
- LetvBugServices
- LetvCellBroadcastReceiver
- LetvCloudService
- LetvDebugUtil
- LetvEcoProvider
- LetvEmojiStore
- Letvexcelliance
- LetvFanNation
- LetvFileManager
- LetvFuseWire
- LetvGalleryRefocus
- LetvLock
- LetvNote
- LetvPersonalized
- LetvPrivacyData
- letvroam_qualcomm_bridge
- letvroam_softsim
- letvroam_virtual
- LetvSDKCommonData
- LetvStateInfo
- LetvStore
- LetvSystemReport
- LetvTeleExtra
- LetvTheme
- LetvThemeStore
- LetvUsageStatsReporter
- LetvUserManual
- LetvVideoLeading
- LetvVideoPlayer2
- LetvVoiceAssistant
- LetvWallet
- LetvWallpaperOnline
- Letvxinghao
- Letvztpj
- LetvZxing
- LeUICalendarImporter
- llq
- LvrSetupWizard
- MIPop
- MIUIrebootV1.1
- Mmi
- ModemTestMode
- Music
- NetworkLocation_Naidu
- RE
- Screenmask
- SogoInput
- stat
- Stk
- superlive
- supersearch
- tqrLetv
- TrRemoteService
- VoiceAssistant
- VRAdmin
- wdj
- WiHDSampleApp
- WiHDService
- yyzx
- zysc
How to install Google Edition Rom On LeEco Pro 3-
Step: 1) First, download and install a custom recovery. If you already had a custom recovery installed on your device then skip this step.
Step: 2) Download the Rom File and Gapps from above and save it on your device.
Step: 3) Now Boot your device into Recovery mode by press and hold “Volume Down+Power Button”
Step: 4) Now you will enter into recovery mode. Now in TWRP, create a Nandroid backup (Recommended) of your device for safer side, if anything goes wrong.
Step: 5) Now do a Factory Reset by Goto Wipe>Advanced Wipe>Select Wipe cache, Dalvik cache, System, and data and swipe to confirm it.
Step: 6) Now, Go to Install and locate the ROM zip file & swipe to Install the ROM file. After the process completes, Flash the GApps zip file.
Step: 7) Now wipe cache & Dalvik cache again and Reboot your device.
Step: 7) Done!
So this is A Complete Guide to install Google Edition Custom Rom On LeEco Le Pro3 if you have any Question Let US Know Via Comment,Step: 2) Download the Rom File and Gapps from above and save it on your device.
Step: 3) Now Boot your device into Recovery mode by press and hold “Volume Down+Power Button”
Step: 4) Now you will enter into recovery mode. Now in TWRP, create a Nandroid backup (Recommended) of your device for safer side, if anything goes wrong.
Step: 5) Now do a Factory Reset by Goto Wipe>Advanced Wipe>Select Wipe cache, Dalvik cache, System, and data and swipe to confirm it.
Step: 6) Now, Go to Install and locate the ROM zip file & swipe to Install the ROM file. After the process completes, Flash the GApps zip file.
Step: 7) Now wipe cache & Dalvik cache again and Reboot your device.
Step: 7) Done!
Search tag-
pixel rom for LeEco Le Pro3, google edition rom for LeEco Le Pro3, google pixel xl rom for LeEco Le Pro3, best custom rom for LeEco Le Pro3, stable custom Rom for LeEco Le Pro3, cm13 stable for LeEco Le Pro3, cm14 stable rom for LeEco Le Pro3, lineage os for LeEco Le Pro3,
Labels: Custom ROM, LeEco Le Pro 3, Pixel Ui
posted by johan @ January 30, 2017
0 Comments


