How to Install official Rom on MyPhone my96 DTV
Official Rom for MyPhone my96 DTV-
stock firmware now available for MyPhone my96 DTV, you Can Download and install This Rom on your Device by following below Guide,
Step 1.Download SP flash tools from above link and extract in a folder.{you can Extract on Desktop For Batter navigation,
Step 2.install correct adb and Vcom Driver in your PC from above link[wrong Driver installation cause failure]
Step 3.Download[Tools, Rom, Recovery Etc} from above for your device and extract in a folder.
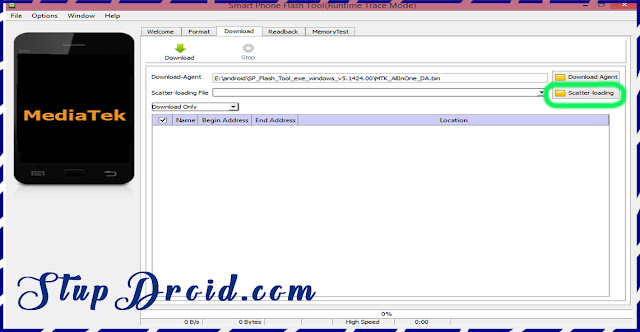
Step 4.Go to extracted SP tools folder and run sp flash tools exe file.{extracted In Above Steps]
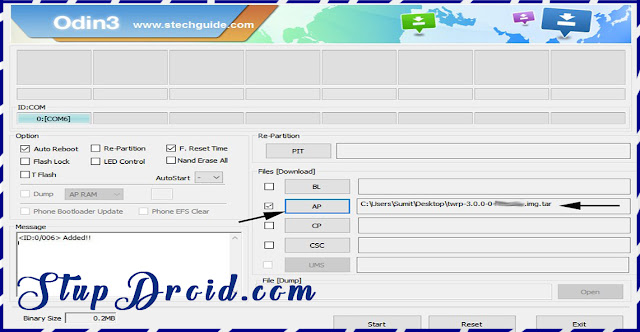
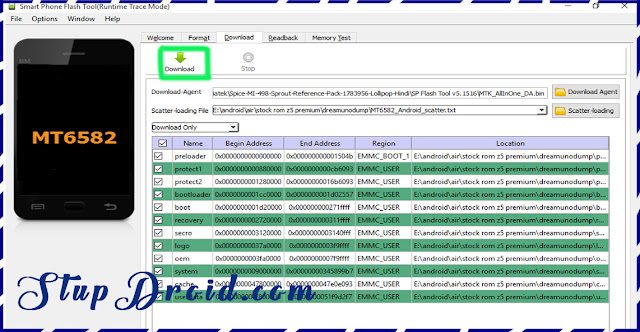
Step 5.in SP tools go to Download tab and click on load scatter file and select scatter file from stock Rom folder.
Search tag-
stock firmware now available for MyPhone my96 DTV, you Can Download and install This Rom on your Device by following below Guide,

Download and install Stock Rom/ firmware/ flash file on MyPhone my96 DTV, today we will Show you How to install Stock Rom on MyPhone my96 DTV, after flashing the Rom you are back on Stock And All personal data will erased, wrong flashing the Rom cause damage on your Device so be careful before doing anything, we are not responsible for any damage, the Rom come with android os and a scatter file which is flashable Via SP flash tools,you can also use this Rom to unbrick your MyPhone my96 DTV and in Development of Custom Rom and Recoveries, Follow Below Guide to install stock rom on MyPhone my96 DTV,
Note-- This ROM/Recovery is work on Listed Device only. Don’t try this on any other device.otherwise it cause bootloop,
- This is the stable version of Rom/Recovery.
- Follow the steps correctly otherwise you may brick your device. We are not responsible for any damage to your phone.
- It will erase all your data, so we advise you first to take a complete backup of your phone and then proceed.
- Ensure that your phone has at least 50-60% charged to prevent the accidental shutdown in-between the process,
- How to Install Xtram Music pure audio on any Android Device
- How to install Xposed Framework on Any android Device
- How to Install htc Gallery on any Android Device
- How to Install Dolby Atoms on Any android Device
- Sp Flash tool latest Support MT67XX / or Use From Rom
- pc and usb
- vcom Driver must installed
- Rom file full zip DTV
Step 1.Download SP flash tools from above link and extract in a folder.{you can Extract on Desktop For Batter navigation,
Step 2.install correct adb and Vcom Driver in your PC from above link[wrong Driver installation cause failure]
Step 3.Download[Tools, Rom, Recovery Etc} from above for your device and extract in a folder.
Step 4.Go to extracted SP tools folder and run sp flash tools exe file.{extracted In Above Steps]
Step 5.in SP tools go to Download tab and click on load scatter file and select scatter file from stock Rom folder.
Step 6.select what you want flash Select Whole Rom {in custom Recovery case Check Recovery Only}
Step 7.Remove battery of your phone and click on download button and immediately connect your smartphone into using usb.{if Not Detect then insert battery and connect}
Step 8.wait while flashing is complete it take a few minut to flash after success.insert battery and you are done switch on your smartphone.
So This is the Complete Guide to Install Stock Rom on MyPhone my96 DTV if you have any question Let Us Know Via Comment,Search tag-
Stock Rom MyPhone my96 DTV, firmware for MyPhone my96 DTV flash file for MyPhone my96 DTV rom install onMyPhone my96 DTV, cara flash MyPhone my96 DTV, flashing instructions for MyPhone my96 DTV, rom download for MyPhone my96 DTV car flash MyPhone my96 DTV, step to unbrick MyPhone my96 DTV twrpMyPhone my96 DTV, root MyPhone my96 DTV, nougat update for MyPhone my96 DTV,
Labels: Flash File, MyPhone my96 DTV, Stock ROM
posted by johan @ January 31, 2017
0 Comments
![]()